|
|||||||||||||||
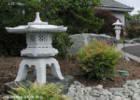
Japanese Garden Design ProjectI set out to transform a neglected area of our backyard into a Japanese influenced garden retreat. I love to garden and have planted
seven trees and numerous shrubs in my backyard. I have Black Pines, Camellias and Azaleas throughout my l As I mentioned, the space that I set out to transform was behind my addition and out of view of the rest of the backyard. A concrete walkway with brick ribbons leads to the area and out to the side gate.
Garden Project Stage 1 - Clean - upThere was a lot of debris which had accumulated in the planting bed over the years and I wanted to clean the area to make room for the
I began by digging up the existing plants and removing the broken concrete and rocks. This was necessary to provide a nice fresh area
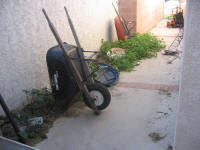
for the new plants and garden accessories. I placed the plants in a trash bag to be taken to the local nursery for recycling into mulch and piled the concrete and rocks into the
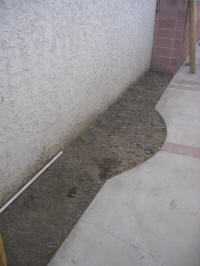
wheelbarrow. They were taken to a neighbor's home where they were used as filler on a home addition project they were doing. I then removed excess dirt from the planter in order bring it down to grade level. I also plan on placing small rocks in the bed so I
needed the room to do that. I simply relocated the dirt into an existing planter in my yard. When moving dirt from one planter to another, be carefu
|
|
||||||||||||||


 arge
arge 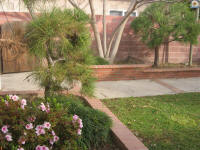 backyard garden. I also have Pigmy Date Palms
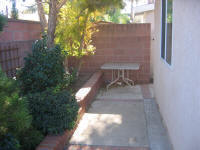
sprinkled throughout. There is no real theme, just many of the plant varieties I love. The area has a large grassy area in the middle and does not have much shade. I wanted to create a
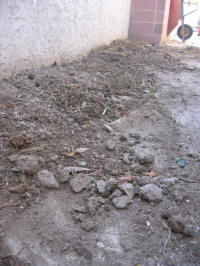
more secluded cozy area were I can relax in private. There is an area of the yard which is neglected and out of sight. In the past, I have used this area to dump concrete rocks and excess
dirt. There were Calla Lilies and a wild tomato plant which were pulled out and re-grew there as well. The area was unsightly and was wasted space. There is a Melaleuca tree which
overhangs the concrete and brick walkway and provides shade there. The area has block walls, and stucco on the house walls.
backyard garden. I also have Pigmy Date Palms
sprinkled throughout. There is no real theme, just many of the plant varieties I love. The area has a large grassy area in the middle and does not have much shade. I wanted to create a
more secluded cozy area were I can relax in private. There is an area of the yard which is neglected and out of sight. In the past, I have used this area to dump concrete rocks and excess
dirt. There were Calla Lilies and a wild tomato plant which were pulled out and re-grew there as well. The area was unsightly and was wasted space. There is a Melaleuca tree which
overhangs the concrete and brick walkway and provides shade there. The area has block walls, and stucco on the house walls. new garden. I used the following gardening tools during the project: Pick - to remove large items and to till the
hard dirt, 3 Pronged Rake - to separate the larger stones from the dirt, Shovel - to dig up the neglected garden plants and
new garden. I used the following gardening tools during the project: Pick - to remove large items and to till the
hard dirt, 3 Pronged Rake - to separate the larger stones from the dirt, Shovel - to dig up the neglected garden plants and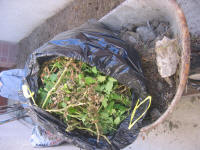
 l. You do not want to place dirt over the root ball of certain plants or they will die out.
Specifically, the roots of camellias and azaleas need to "breath" and must not be covered with too much dirt. After the area was cleaned up of unwanted of plants and debris, I raked it
again to remove any additional loose pebbles. The bed is now ready to be planted, and will be done near the final stages of the project.
l. You do not want to place dirt over the root ball of certain plants or they will die out.
Specifically, the roots of camellias and azaleas need to "breath" and must not be covered with too much dirt. After the area was cleaned up of unwanted of plants and debris, I raked it
again to remove any additional loose pebbles. The bed is now ready to be planted, and will be done near the final stages of the project.Japanese Garden Design Step 1 - Clean up • Step 2 - Bamboo Fence • Step 3 - Brick Planter • Step 4 - Selecting Plants • Japanese Garden Before and After